少糖少油紅豆沙餡 甜而不膩的慢食光 How to Make Sweet Red Adzuki Bean Paste (Anko) from scratch

你的關注給我最大的鼓勵,請支持訂閱肥丁 Youtube 頻道

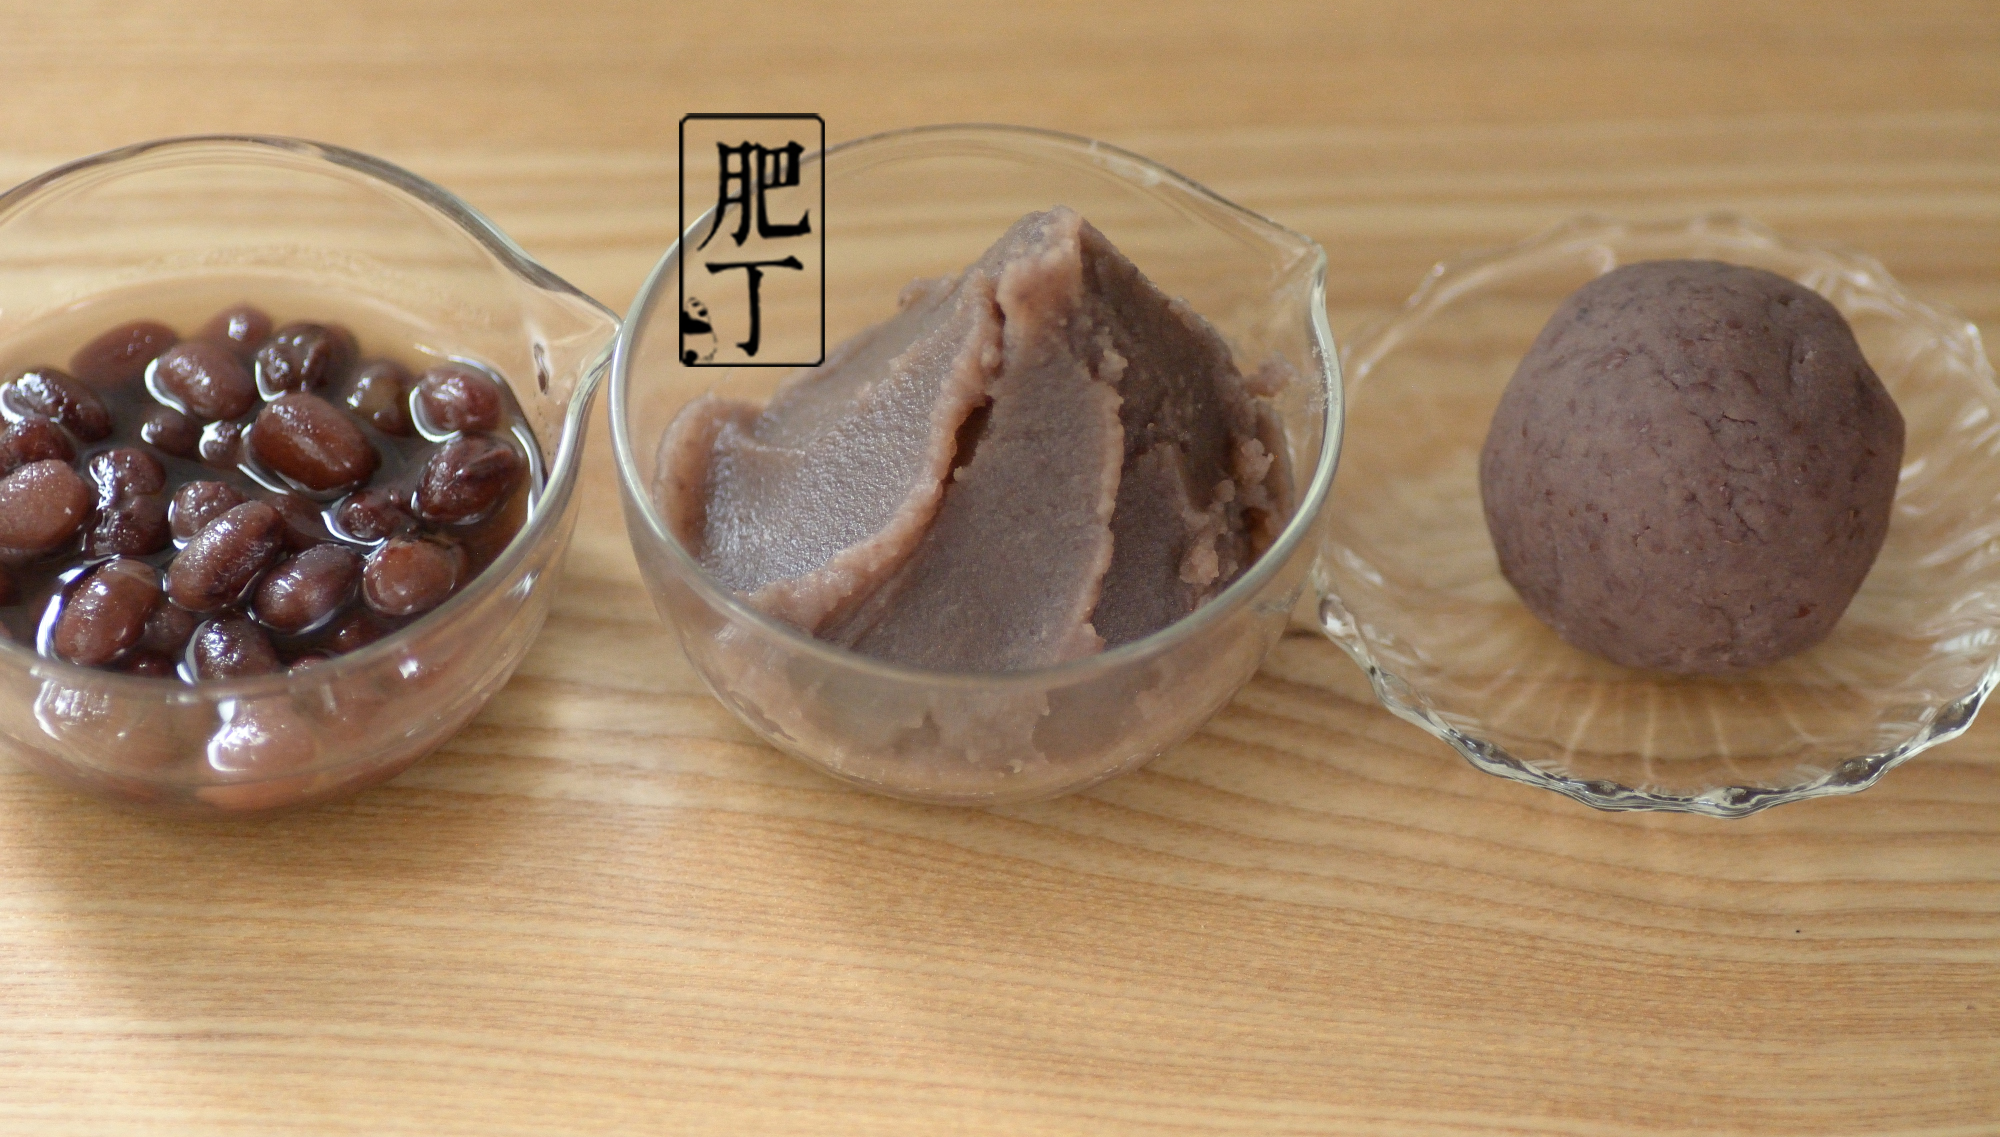
紅豆是可塑性很高的食材,通過改變熬煮時間和配料,調整軟硬度,以適合各種點心
- 豆沙(去殼)
- 蜜漬紅豆(豆殼不破豆仁軟)
- 紅豆泥餡(豆仁綿蜜帶湯汁)

【原蔗糖】
原蔗糖是提煉蔗糖的第一道結晶,保留甘蔗風味,跟紅豆搭配恰度好處。糖精煉越多 純度越高,甜度越低,原蔗糖是較少精煉的蔗糖,含礦物質容易被舌頭辨認,即使減糖也可達到理想的甜味
【紅豆泥為甚麼加入澄粉?】
澄粉從小麥提取的澱粉,加熱煮熟後不會變硬,可使維持紅豆餡的形狀,而不影響口感,包餡後 會吸收餅皮的水或油,澄粉吸收水份後 不會變軟出水,足夠支撐點心皮的重量,適合需要烘烤的點心,製作點心,餡料跟餅皮的平衡很重要,傳統豆沙餡料需要大量的油脂,使豆沙在冷卻時凝固,方便塑形,加入澄粉之後,可以減少大量的油,萬用餡料

【紅豆沙餡 · 做法】
- 紅豆 Adzuki Beans 200 g
- Demerara 原蔗糖 Demerara Raw Cane Sugar 100 g
- 海鹽 一小撮 A pinch of sea salt
【紅豆泥餡 · 做法】
- 紅豆 Red Bean 250 g
- 清水 Water 800 ml
- 原蔗糖 Demerara Raw Cane Sugar 100 g
- 麥芽糖 Homemade Maltose 2 大匙
- 澄麵 ( 澄粉 ) Wheat Starch 15 g
- 油 Oil 1 大匙
- 海鹽 Sea Salt 適量

【紅豆沙餡 · 做法】
1. 依照蜜漬紅豆的影片,將紅豆以水煮沸騰、降溫、過濾、冷卻、換水的流程, 重複3~4 次去除澀味,豆類需要根據品種、產地、季節及保存狀態,改變熬煮的時間。豆越舊越乾硬,且容易走味,比起完全按照食譜指示的時間,熬煮時即時試食,確認紅豆的口感更為重要
蜜漬紅豆食譜 http://www.beanpanda.com/144459
2. 將紅豆煮至熟透,豆殼和豆仁分離,紅豆煮熟綿密,能一壓軟爛,便適合製作豆沙,新豆快熟,舊豆慢熟
3. 煮熟的紅豆放在網篩上,用飯勺按壓,把豆沙擠出來
4. 將熬煮過紅豆的豆汁,倒入豆殼碎片,豆汁倒完了,倒入清水,把殘留在豆殼的澱粉質沖刷出來

5. 放進冰箱靜置約 5~6 小時,讓豆沙沉澱,6 小時後,出現明顯的分層,用湯勺撈掉上面較清澈的水,放進冰箱一夜,繼續沉澱,液態狀和固體豆沙一同放進冰箱
6. 第 2 天,上面的水變得更清澈,舀走清澈的水,貼近豆沙的水份很難分離,沒關係,稍後炒豆沙會蒸發掉
7. 固體豆沙和液體豆沙,一同放入鍋裡,加入一半原蔗糖,小火加熱,以木鏟輕輕攪拌
8. 用指腹沾少許鹽,加入豆沙可提引甜味,完全混合後,加入餘下的一半原蔗糖
9. 中火加熱把糖溶化後,豆沙變得流動 調至小火,由於水份少,非常濃稠,加熱時容易濺起,多攪拌讓豆沙充分受熱
10. 水份持續蒸發,豆沙流動性降低,用木勺舀起來,豆沙不會立即掉下去,便可以起鍋
11. 少量地舀入搪瓷或玻璃容器內,豆沙冷卻後會變得硬一些,用刮刀抹平表面,蓋上保鮮膜,緊貼豆沙表面,冰箱可冷藏一週
12. 豆沙混合蜜漬紅豆,便成紅豆粒餡,有兩種不同的口感,豆沙口感柔軟,適合做抹醬,或不需要烘烤的點心餡料


【少油紅豆泥餡 · 做法】
1. 按照蜜漬紅豆的影片,完成去澀後
2. 把紅豆熬至綿密,收汁至只剩餘少量湯汁,用手持攪拌棒,連豆殼一起攪拌,或用調理機打成泥
3. 加入 原蔗糖,中火加熱,攪拌均勻,直至糖完全溶化
4. 加入自製麥芽糖、苦茶油,或味道不突顯的植物油
5. 加入岩鹽,攪拌均勻,若還有塊狀,再打一次,中火加熱
6. 持續攪拌,水份越來越少,變得濃稠
7. 加入澄粉,攪拌均勻
8. 冷卻後的紅豆泥,用湯勺刮起便能形成球狀,冰箱可冷藏約 1 週,放入夾鏈袋壓平,冷凍保存約 1~3 個月,冷凍時間越長,風味營養流失越多

Make sure to subscribe so that you don’t miss out on my future video
Red beans are a highly versatile ingredient; by adjusting the cooking time and additional ingredients, one can modify their softness and hardness to suit various snacks.
- Red bean paste (shelled)
- Candied Red Beans (Soft Bean Kernels with Intact Shells)
- Red bean paste filling (bean curd with syrup and juice)
【Raw Cane Sugar】
Raw cane sugar is the first crystallization of refined cane sugar, retaining the flavor of sugarcane and pairing well with red beans. The more it is refined, the higher the purity and the lower the sweetness. Raw cane sugar is less refined, contains minerals that can be easily recognized by the tongue, and can achieve an ideal sweetness even with reduced sugar.
【Why is cornstarch added to red bean paste?】
Tapioca flour, extracted from wheat, does not harden when heated and cooked, allowing it to maintain the shape of red bean filling without affecting the texture. After being wrapped, it absorbs the moisture or oil from the pastry skin; once tapioca flour absorbs moisture, it does not become soft or leak. It is sufficient to support the weight of the pastry skin, making it suitable for baked snacks. In making dim sum, balancing the filling with the pastry skin is crucial. Traditional red bean paste requires a significant amount of fat to solidify upon cooling, facilitating shaping. By adding tapioca flour, a large amount of oil can be reduced, creating a versatile filling.
Red Bean Paste ►Ingredients
- Adzuki Beans 200 g
- Demerara Raw Cane Sugar 100 g
- A Pinch of sea salt
Red Bean Paste · Recipe
❶ According to the video on sweetened red beans, the process of boiling the red beans in water, cooling them down, filtering, and changing the water is repeated 3 to 4 times to remove the bitterness. The cooking time for the beans needs to be adjusted based on their variety, origin, season, and storage conditions. Older beans tend to be drier and harder, and they can easily lose their flavor; therefore, it is more important to taste the beans while cooking to confirm their texture rather than to strictly follow the prescribed cooking time in the recipe.
❷ Sweetened Red Bean Recipe http://www.beanpanda.com/144459 Cook the red beans until thoroughly cooked, allowing the skins and the beans to separate. When the red beans are cooked soft and creamy, they are suitable for making red bean paste. New beans cook quickly, while older beans take longer to cook.
❸ Cooked red beans are placed on a sieve and pressed with a rice spoon to squeeze out the paste.
❹ Pour the red bean broth that has been boiled into the crushed bean husks; once the broth is finished pouring, add clean water to wash out the remaining starch from the husks.
❺ Place it in the refrigerator and let it sit for about 5 to 6 hours to allow the red bean paste to settle. After 6 hours, there will be a noticeable separation. Use a ladle to remove the clear water from the top, and put it back in the refrigerator overnight to continue settling. Store both the liquid and solid red bean paste in the refrigerator.
❻ On the second day, the water on top became clearer. Scooping out the clear water made it difficult to separate the moisture close to the red bean paste. It’s okay; the moisture will evaporate when the red bean paste is stir-fried later.
❼ Solid and liquid red bean paste are placed together in a pot, half of the raw cane sugar is added, heated over low heat, and gently stirred with a wooden spatula.
❽ Use the pad of your finger to dip into a little salt, add it to the red bean paste to enhance the sweetness. After fully mixing, add the remaining half of the raw cane sugar.
❾ Heat over medium heat until the sugar melts, causing the red bean paste to become fluid. Then reduce to low heat; due to the low moisture content, it becomes very thick and can easily splatter while heating, so stir frequently to ensure the red bean paste is evenly heated.
❿ The moisture continues to evaporate, and the flowability of the red bean paste decreases. When lifted with a wooden spoon, the paste does not immediately drop down, indicating that it can be removed from the pot.
❶❶ Scoop a small amount into an enamel or glass container. The red bean paste will harden a bit after cooling. Use a spatula to smooth the surface, cover it with plastic wrap tightly against the bean paste surface, and refrigerate in the fridge for up to a week.
❶❷ Sweet red beans mixed with red bean paste create a filling with two different textures. The paste is soft, making it suitable for spreads or fillings for no-bake desserts.
Low Oil Red Bean Paste►Ingredients
- Adzuki/Red Bean 250 g
- Water 800 ml
- Demerara Raw Cane Sugar 100 g
- Homemade Maltose 2 tbsp
- Wheat Starch 15 g
- Oil 1 tbsp
- A pinck of Sea Salt
Low Oil Red Bean Paste · Recipe
❶ Follow the video on sweet red beans to complete the process after removing the bitterness.
❷ Simmer the red beans until they become creamy and reduce the liquid until only a small amount remains. Use a handheld mixer to blend the mixture, including the bean skins, or use a food processor to make it into a paste.
❸ Add the raw sugar, heat over medium heat, and stir evenly until the sugar is completely dissolved.
❹ Add homemade malt syrup, bitter tea oil, or oils with subtle flavors.
❺ Add rock salt and stir well; if there are still clumps, beat again, then heat over medium heat.
❻ Stir continuously; as the moisture decreases, it becomes thicker.
❼ Add the tapioca starch and mix well.
❽ The cooled red bean paste can be scooped into ball shapes with a spoon and can be refrigerated for about 1 week. Flatten it in a ziplock bag for freezing, which can last about 1 to 3 months; the longer it is frozen, the more flavor and nutrients are lost.
[:]


