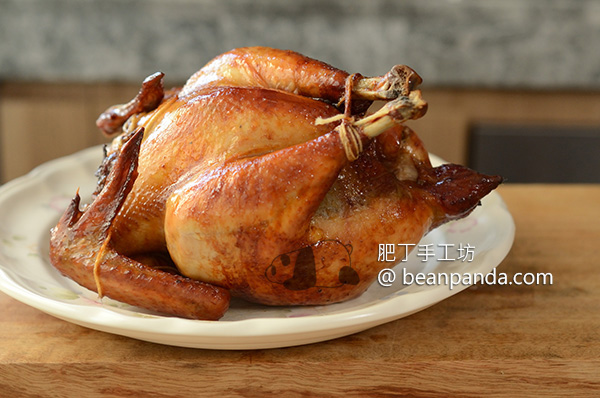
脆皮烤雞 雞皮薄如紙 肉嫰超多汁 Delicious Roasted Chicken ~ My Secret Recipe

你的關注給我最大的鼓勵,訂閱肥丁 YouTube 頻道
好的烤雞有兩個重點,脆皮肉嫩。優質食材永遠是成功的基礎,現在的魚和雞,可能因為量產和人工養殖的關係,大多味道平淡,鮮味欠缺,雞有雞味已經不是必然,料理時需要加入香料或濃重的調味,去掩蓋食材本身的鮮味不足。熊貓先生經常戲言,究竟是吃烤雞還是吃調味料,誰是主角。所以第一步不要先討論料理的方法,而是去找一隻品質好的雞。

食材新鮮遮三醜,本地家禽是首選,不同品種雞隻各有特色,適宜不同烹調方法。烤雞適宜選皮下脂肪較多的品種,如皇健雞,皮及肉脂肪含量在三黃雞與嘉美雞之間,有一定的油脂但不如三黃雞般肥膩。皇健雞體型較大、肉質較軟嫩細滑,雞香味濃、天然雌激素含量較少。
遇上品質好的走地雞,不需要香料,簡單用醬油、魚露,紅蔥頭蒜汁提鮮,烤好就是濃郁有鮮活氣息的雞香味。

西廚喜歡用鹽乾醃或鹽水泡,但鹹味比較單一,需要加入其他香料來豐富味道。醬油、魚露,紅蔥頭蒜汁是丁媽醃汁的鐵三角,效果類似西式鹽水濕醃,但是鹹味更豐富更有層次感,更好提引雞肉的香氣。醬油魚露都含有鹽份,因滲透壓的關係,鹽巴一開始會讓雞肉流失水份,但經過一段時間後,雞肉會回吸滲出來的水份,通過較長時間的醃漬,保留住雞肉的水份,令雞肉更加鮮嫩多汁,尤其是缺乏油脂的雞胸肉,可避免過於乾柴。這個方法無論醃雞、火雞、乳鴿幾乎是百戰百勝。

雞皮在烘烤的過程會不斷吸收雞肉的水氣,如果沒有做好隔絶皮肉之間的連繫,雞皮怎樣烤都不會脆,所以通過風乾雞皮和拉開雞皮,對烤脆雞皮十分有幫助。
至於烤出雞肉軟嫰多汁,功夫在於烘烤溫度的控制。傳統烤雞的觀念是以攝氏 200 度左右把全雞丟進烤箱裡。但過度高溫會破壞表皮組織,出現雞皮烤焦了但雞肉仍未熟透的情況。我用類似舒肥的概念,以低溫拉長烘烤時間,把雞肉一點一點向內慢熟,肉汁不會流失,以溫度計測量雞胸最厚處達到70度,沒有血水流出,雞肉就是熟了,然後才提高溫度烤脆雞皮上色。每隻雞重量不可能一模一樣,從1至1.6公斤不等。難處就在不同的烤箱,不同的雞隻大小,溫度和時間,溫度和時間都需要調整。我做了兩次,才把握準確的溫度和時間配對。

【材料】
- 皇健少爺雞 Wongkin Rooster 1.5 Kg
- 釀造釀油(沒有焦糖色素) Fermented Light Soy Sauce 5 大匙
- 魚露 Vietnam Fish Sauce 1 大匙
- 黑醋 Black Vinegar 1 大匙
- 原蔗糖 Demerara Raw Cane Sugar 7 小匙
- 紅蔥頭蒜頭汁 Shallots & Garlic Juice 2 大匙 (紅蔥頭4顆、多瓣蒜半顆)
- 現磨黑胡椒粉 Freshly Grated Black Pepper 1/2 小匙
- 雙蒸米酒 Chinese Rice Wine 1 大匙
- 橄欖油或溶化奶油 Extra Virgin Olive Oil or Melted Unsalted Butter 4 小匙
皇健少爺雞 https://bit.ly/36m0zxK
金雅典 Athens ISO-996 40公升座台式三合一蒸焗爐 https://bit.ly/3mq4lvi
博仕牌錫紙(25呎) https://bit.ly/33tcyY9

【做法】
1. 蒜頭去皮,紅蔥頭去頭尾,放入水裡去皮比較容易,順便沖洗皮裡面的黑泥,用手提調理棒打末,放入棉布袋,榨出汁液。餘下來放入夾鏈袋冷凍,可以下次炒菜使用
2. 皇健雞去頭和頸部,剪去雞腳,可冷藏保留熬湯,雞的內臟和血水清理乾淨
3. 雞隻放入夾鏈袋,加入釀造醬油,魚露,雙蒸米酒,Demerara 原蔗糖,現磨黑胡椒粉,紅蔥頭蒜頭汁,輕輕按摩一下,小心別弄破夾鏈袋,放冰箱冷藏一夜

4. 全雞無法整隻,浸泡在醃汁裡,每隔幾小時翻面,確保入味,翌日從冰箱取出,用手輕輕分離雞皮與雞肉,雞背接近中間位置,很難剝皮,不要勉強以免弄破雞皮,不美觀
5. 用滾水澆淋雞皮,不要放入鍋裡煮,燙一下就可以了,燙過的雞皮,蛋白質會變性熟化,烤的時候不會再吸收肉的水份,不會變軟而烤不脆,先拉開雞皮再燙水,雞皮比較不容易破裂
6. 把雞隻固定在燒烤串上
7. 烤盤包鋁紙,烤盤放在烤箱底層,以盛載滴下來的雞油雞汁
8. 雞隻放入烤箱,後部熱風70°C,低溫風乾約 30 ~ 40 分鐘,先以低溫把雞皮的水份烘乾,加熱風乾,減少微生物活動,避免乾燥時滋生細菌
9. 當雞皮表面摸起來不黏手,從烤箱取出,預熱烤箱至 150°C,輕輕拉開雞皮,在皮與肉之間抹上油,奶油或橄欖油都可以,奶油比較酥 橄欖油比較清新
10. 儘量全身都塗抹到油,雞皮表面也均勻抹上油,輕輕按摩,油脂可隔絶雞肉與皮之間的水氣,阻止雞皮在烘烤時,繼續吸收雞肉的水份而變軟。若你買了冷藏雞,想加入香料,可以這個步驟把香料塞入塗抹在皮肉之間
11. 若不想烤好後雞腿分開,不美觀,用料理繩把雞腿綁好,首先在一只腿上打結,然後連接到另一隻腿,繞一圈再打個結,把兩隻腿綁起來繞兩圈,再打個結,收口
12. 另一根繩子繞到雞背,置中對齊,從雞翅底部繞上來兩圈,另一邊雞翅做法相同,把兩根繩子帶住中心,拉緊,打雙結固定,剪去多餘的繩子

13. 放入烤箱,頂部熱風 140°C,烤約 30 ~ 40 鐘。低溫先把肉的中心烤熟,若先以高溫烘烤,雞皮會先烤焦但雞肉未熟,用探針溫度計插入核心,70°C沒有血水就是熟了,雞腿骨外露,是雞肉熟了的一個指標
14. 取出雞,推高烤箱溫度至 200°C,預熱約 10 分鐘,雞要先取出來,再調溫。否則雞在烤箱裡,升溫速度太慢,很難預計雞皮上色的時間,雞肉容易烤過老
15. 為避免雞翅過快焦黑,雞全翅部份包裹鋁箔紙
16. 第 3 次放入雞,200°C 烤 10 分鐘,利用高溫把雞皮,烤至出現梅納反應,快速讓雞皮上色,焦香滿溢,可以上桌了,除去烤架串、鋁箔紙和繩,趁熱享用

Your attention gives me the greatest encouragement, subscribe to Beanpanda’s YouTube channel.
The key to a well-cooked roast chicken lies in its crispy skin and tender meat. Good ingredients are always the foundation of success. Nowadays, fish and chicken often have bland flavors due to mass production and artificial breeding, and it’s no longer a given that chicken has the distinct taste of chicken. During cooking, spices or strong seasonings need to be added to mask the lack of freshness in the ingredients. Mr. Panda often jokingly asks whether we are eating roast chicken or the seasonings; who is the real star? Therefore, the first step is not to discuss the cooking methods but to find a chicken of good quality.
Fresh ingredients are the key to delicious dishes, and local poultry is the top choice. Different breeds of chickens each have their unique characteristics, making them suitable for various cooking methods. Roasting chicken is best with breeds that have a higher fat content under the skin, such as Huangjian chicken, which has a fat and meat content between the Sanhuang and Jiamai chickens. It has a certain amount of grease but is not as greasy as the Sanhuang chicken. Huangjian chickens are larger in size, with tender and smooth meat, a strong chicken flavor, and lower levels of natural estrogen.
When encountering high-quality free-range chicken, there’s no need for spices; simply use soy sauce, fish sauce, and a garlic shallot juice to enhance the flavor, and once roasted, it exudes a rich and vibrant aroma of chicken.
The Western kitchen often uses salt dry brining or brining in saltwater; however, the salty flavor can be quite one-dimensional, so other spices are needed to enrich the taste. Soy sauce, fish sauce, and the shallot-garlic juice form the “iron triangle” of marinating, producing results similar to Western-style wet brining but with a richer and more layered salty flavor that better enhances the aroma of the chicken. Both soy sauce and fish sauce contain salt, and due to osmotic pressure, salt will initially cause the chicken to lose moisture. However, after some time, the chicken will reabsorb the moisture that has seeped out. With longer marinating times, the chicken retains its moisture, making it more tender and juicy, especially for the lean chicken breast, which can otherwise become overly dry. This method is virtually foolproof for marinating chicken, turkey, or squab.
During the roasting process, chicken skin continuously absorbs moisture from the meat; if the connection between the skin and meat isn’t properly isolated, the skin won’t turn crispy no matter how it’s baked. Therefore, air-drying the chicken skin and separating it from the meat are very helpful for achieving crispy roasted chicken skin.
When it comes to roasting chicken to achieve a tender and juicy result, the key lies in controlling the baking temperature. The traditional idea of roasting a chicken involves tossing a whole chicken into the oven at around 200 degrees Celsius. However, excessive heat can damage the skin, leading to burnt chicken skin while the meat remains undercooked. I employ a method similar to sous vide, using low temperatures to extend the cooking time, allowing the chicken to cook more evenly from the inside, preserving its juices. I measure the thickest part of the chicken breast to reach 70 degrees Celsius without any blood running out, ensuring it is cooked through before raising the temperature to crisp the skin and achieve a nice color. Each chicken varies in weight, ranging from 1 to 1.6 kilograms. The challenge lies in the fact that different ovens and varying chicken sizes require adjustments for temperature and time. I had to test it twice to nail down the precise temperature and time pairing.
【Ingredients】
- 皇健少爺雞 Wongkin Rooster 1.5 Kg
- 釀造釀油(沒有焦糖色素) Light Soy Sauce 5 tbsp
- 魚露 Vietnam Fish Sauce 1 tbsp
- 黑醋 Black Vinegar 1 tbsp
- 原蔗糖 Demerara Raw Cane Sugar 7 tsp
- 紅蔥頭蒜頭汁 Shallots & Garlic Juice 2 tbsp (紅蔥頭4顆、多瓣蒜半顆)
- 現磨黑胡椒粉 Freshly Grated Black Pepper 1/2 tsp
- 雙蒸米酒 Chinese Rice Wine 1 tbsp
- 橄欖油或溶化奶油 Extra Virgin Olive Oil or Melted Butter 4 小匙 tsp
皇健少爺雞 https://bit.ly/36m0zxK
金雅典 Athens ISO-996 40公升座台式三合一蒸焗爐 https://bit.ly/3mq4lvi
博仕牌錫紙(25呎) https://bit.ly/33tcyY9
【Instructions】
❶ Peel the garlic and trim the ends of the shallots. Soak them in water to make peeling easier and rinse off the black dirt from the skins. Use a hand blender to chop it into a fine paste, then place it in a cotton cloth bag and squeeze out the juice. The remaining pulp can be stored in a ziplock bag and frozen for use in future stir-fries.
❷ Remove the head and neck of the chicken, cut off the chicken feet, and refrigerate them for making soup; clean the chicken’s blood and internal organs thoroughly.
❸ Put the chicken in a ziplock bag, add brewed soy sauce, fish sauce, double-steamed rice wine, Demerara sugar, freshly ground black pepper, and shallot-garlic juice. Gently massage it, being careful not to break the ziplock bag, and refrigerate it overnight.
❹ The whole chicken cannot be prepared as a whole; soak it in the marinade, flipping it every few hours to ensure it absorbs the flavor. The next day, take it out of the fridge and gently separate the chicken skin from the meat using your hands. The back of the chicken, closer to the middle, is difficult to skin; do not force it, as it may tear the skin and make it unappealing.
❺ Pour scald the chicken skin with boiling water, do not put it in the pot to cook; a quick blanch is sufficient. The protein in the blanched chicken skin will denature and cook, preventing it from absorbing moisture from the meat during roasting, which keeps it crispy instead of becoming soft. First, stretch the chicken skin before scalding; this way, it is less likely to break.
❻ Fix the chicken on the barbecue skewer.
❼ Line a baking tray with aluminum foil, placing the tray on the bottom rack of the oven to catch the drippings of chicken fat and juices.
❽ Place the chicken in the oven with the rear hot air set to 70°C, and dry it at low temperature for about 30 to 40 minutes. This will first help to dry the moisture from the chicken skin, reduce microbial activity during heating, and prevent bacteria from growing during the drying process.
❾ When the chicken skin feels non-sticky to the touch, remove it from the oven, preheat the oven to 150°C, gently pull apart the chicken skin, and spread oil between the skin and the meat; both butter and olive oil are fine, with butter being flakier and olive oil being fresher.
❿ Make sure to thoroughly coat the entire chicken with oil, including the surface of the skin, and gently massage it in. The oil creates a barrier that prevents moisture from seeping between the chicken and the skin, stopping the skin from absorbing moisture from the meat and becoming soft during baking. If you have bought refrigerated chicken and want to add spices, you can use this step to tuck the spices in between the skin and the meat.
❶❶ If you don’t want the chicken legs to be separated after roasting, which looks unappealing, tie the legs together with cooking twine. First, make a knot on one leg, then connect it to the other leg. Wrap it around once and tie a knot, then secure both legs by wrapping around twice more and finish with another knot.
❶❷ Another rope is wrapped around the chicken’s back, aligned in the center, making two loops from the bottom of the chicken’s wing upward. The other side of the wing is prepared in the same way. The two ropes are gathered at the center, pulled tight, and secured with a double knot. Any excess rope is trimmed off.
❶❸ Place in the oven, with hot air at 140°C, and bake for about 30 to 40 minutes. The low temperature first cooks the center of the meat; if you start with high temperature, the chicken skin will burn before the meat is cooked. Use a probe thermometer inserted into the core; 70°C with no blood means it’s done, and exposed chicken leg bones are an indicator that the meat is cooked.
❶❹ Remove the chicken and raise the oven temperature to 200°C, preheating for about 10 minutes. The chicken should be taken out first before adjusting the temperature. Otherwise, the chicken will be in the oven, and the heating speed will be too slow, making it difficult to predict the time for the chicken skin to color, which can cause the chicken meat to become overcooked.
❶❺ To prevent the chicken wings from burning too quickly, wrap the whole chicken wings in aluminum foil.
❶❻ For the 3rd round of roasting the chicken, roast at 200°C for 10 minutes. Use high temperature to achieve the Maillard reaction on the chicken skin, quickly giving it color and an aromatic char. It’s ready to serve; remove the roasting rack, aluminum foil, and string, and enjoy it hot.


肥丁老師,我準備烤一個大概4.5KG的火雞。你建議70度和150度分別烤多久呢?然後我買的是冷藏火雞,在放入150度烤箱前,你推薦用什麼香料?謝謝解答